CULTURE OF SUSTAINABILITY BLOG SERIES
Spring can have a way of refueling us after a long winter, and this year it brings even more hope than years past. It can also be when we look around and decide it’s time to pick up all the nerf darts that have accumulated on every surface and in every shoe in the hall….perhaps that is just in my house…
After a winter that had a fair amount of snow and a lock down, cleaning may have been the last thing on your mind. But as the weather warms you may find yourself more motivated, and you may even be hardwired to be! There is a lot of information about the origins of spring cleaning – but when in doubt, trust science.
According to HowStuffWorks:
“During winter, we’re exposed to less sunlight due to shorter, often dreary days. With a lack of exposure to light, the pineal gland produces melatonin — a hormone that produces sleepiness in humans. Conversely, when we’re exposed to sunlight, our bodies produce much less melatonin. It’s possible that we spring clean simply because we wake up from a winter long melatonin-induced stupor and find more energy as the days grow longer when spring arrives.”
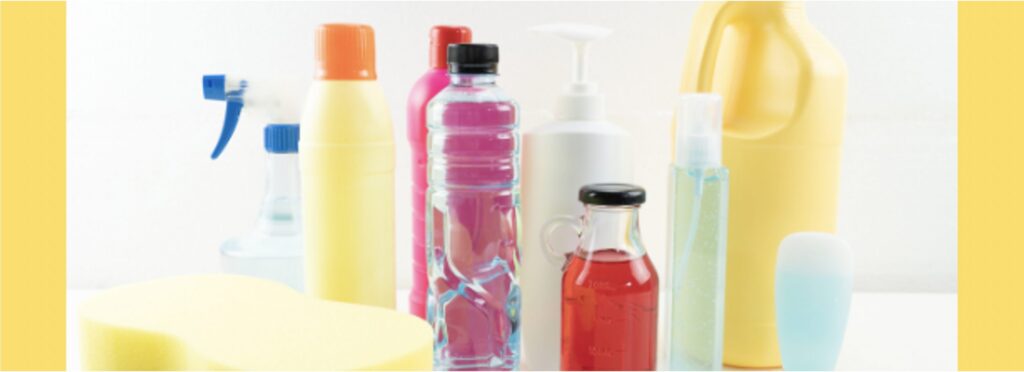
So if you are coming out of hibernation, like me, and are feeling motivated it may be the time to also think about how you’re cleaning. There is a long list of reasons to opt for natural cleaners but the top 2 are reason enough to make the switch.
They are safer
Most traditional home cleaners are toxic -and for pets and children (who are smaller) the exposure risk is even higher. The hazardous chemicals they contain are often carcinogens, neurotoxins, mutagens, teratogens, or endocrine disruptors and they can impact your health and compromise the indoor air quality of your home.
They are better for the environment
Most certified ‘green’ cleaners are also made using sustainable manufacturing practices and naturally derived, safe, non-toxic, and biodegradable ingredients that don’t negatively impact the environment. Conventional cleaning products contain ingredients that are non-biodegradable, and are from non-renewable resources like petroleum.
If you choose to make your own cleaning products, they can also save money and make cleaning easier with fewer products.
Here are some favourite recipes collected from different places over the years from SWR’s own Samatha Tremmel to get you started!
ORANGE DEGREASER
1 1/2 cups of warm water
1 1/2 tsp. of dish liquid
20 drops of orange essential oils
Just mix the following ingredients together and add them to a clean spray bottle.
TOILET CLEANER – LIQUID VERSION
1/2 Cup of Baking Soda
1/2 Cup of Castile Soap
15 Drops of Tea Tree Essential Oil
15 Drops of Lemon Essential Oil
1 Cup of Water
Old Toilet Bowl Cleaner Container or Plastic Bottle with Lid
- Add all of the ingredients to a large bowl and whisk together well.
- Use a funnel to transfer the ingredients to a bottle.
- Squirt or pour a generous amount into your toilet bowl…about 1/4 cup.
- Use a toilet scrub brush or sponge to spread the toilet cleaner around the inside of your bowl, and scrub under the rim and the entire inside of your toilet bowl. Once you are finished, simply flush the toilet to rinse! Your toilet should be fresh, clean and deodorized. I recommend using this method at least once every two weeks and using my Toilet cleaning bombs in between deep cleanings.
TOILET CLEANING BOMBS
1 Cup Baking Soda
1 Tablespoon Dish Liquid (any brand will do)
- Add one cup of baking soda to a large bowl.
- Next, add 1/4 cup of Citric Acid.
- Squirt in 1 tablespoon of dish liquid
- Mix together well using your hands, a spoon or a whisk.
- Now press the mixture into your silicone molds or an ice cube tray, making sure to wipe any excess away.
- Let them dry for at least 4 hours or overnight. Once they are completely dry, gently pop them out and store in an airtight container.
- To clean and deodorize your toilet, simply toss a toilet bomb into your toilet bowl.
- It should start fizzing, which means your toilet cleaning bombs are doing their work!
- These homemade toilet cleaning bombs make toilet cleaning easy and hands free!
LIQUID DISH SOAP
1/4 cup distilled water
1 cup of Castile Soap
2 teaspoons of Vegetable Glycerin
10 drops of Essential Oils (optional)
- Grab your container and a bottle. Add 1/4 cup of water.
- Next, add 1 cup of Castile Soap.
- Now add 2 teaspoons of Vegetable Glycerin.
- If you’d like for your dish soap to be scented, add 10 drops of essential oils. I like lemon and lavender, so I add 5 drops of each.
- Shake well and your homemade liquid dish soap is ready to use!
DISHWASHER PUCKS
1/2 Cup of Borax
1/2 Cup of Washing Soda
1/2 Cup of Baking Soda
1/2 Cup of Citric Acid
1/2 Cup of Kosher Salt
15 Drops of Lavender Essential Oil
15 Drops of Lemon Essential Oil
1/4 Cup of Water (may not use all of it)
An Ice Cube Tray
- Mix all of the ingredients together with a whisk except the water. Mix really well, making sure that the oils are mixed well with the dry ingredients.
- Slowly mix in water, a little bit at a time. I start with about a tablespoon, mix really well, and then check the consistency. Keep adding water until you can form a loose snowball. DO NOT OVER WATER OR THEY WON’T DRY WELL.
- Once your mixture is the right consistency, fill your ice cube tray, pressing down to be sure there are no air pockets.
- Let them dry for 12 – 24 hours. Once they are finished, you should be able to lightly turn your tray and they will drop out like ice cubes.
- You can store them in a baggie or jar, just be sure they don’t get wet until you are ready to use them!
BLEACH ALTERNATIVE
This homemade bleach alternative can be used in your washing machine or in a sink, tub or wash bin.
2 Gallons of Warm/Hot Water
1/2 cup of Washing Soda (you can PURCHASE HERE or see how easy it is to make your own Washing Soda HERE)
1 Cup of Hydrogen Peroxide
- Start by pouring 2 gallons of warm/hot water into a wash bin or sink.
- Next, add 1/2 cup of Washing Soda.
- Finally, add 1 cup of Hydrogen Peroxide.
- Mix well using a whisk or spoon.
- Add any whites that need stain removal or whitening and let them soak for 1-3 hours. Once they are finished soaking, either rinse or wash in your washing machine as you normally would.
- This whitening bleach alternative works great on all whites such as towels, bed sheets, tennis shoes, slipcovers, blankets, baseball and football pants, socks and more! You are going to love it!
THE BEST STAIN REMOVER
This laundry stain removal method doesn’t only work on clothes and linens; it also makes an amazing carpet stain remover!
1 cup of 3% hydrogen peroxide
1/2 cup of dish liquid (any kind will do)
- Add 1 cup of 3% hydrogen peroxide and 1/2 cup of dish liquid to a clean spray bottle.
- Be sure to shake well before each use.
- Spray the stain liberally with the stain removal spray.
- Use your fingers or a soft cloth to gently work the solution into the stain and allow to sit for 3 to 5 minutes.
- Launder your item as usual and voila… stain gone!
WARNING: Test a small spot before treating stain. This stain removal spray works great on whites and colors, but should be tested first on a small area.
FURNITURE POLISH
1 cup of distilled water (tap water is fine, but distilled water helps stretch the shelf life)
1/2 cup of Almond Oil
1/2 cup of White Vinegar
2o drops of Lemon Essential Oil
- Start by pouring 1 cup of water into a clean spray bottle.
- Next, add 1/2 cup of Almond Oil.
- Now add 1/2 cup of White Vinegar.
- If you’d like a little extra cleaning help and a nice lemon scent, add 20 drops of Lemon Essential Oil.
- Give it a good shake before each use. Because there are no binding chemicals, the ingredients separate when left sitting.
- Simply spray a liberal amount onto a clean cloth and use it to clean any wood surfaces…works great on painted furniture, butcher blocks and cutting boards too!
ALL PURPOSE CLEANER
1 cup water
1 cup distilled white vinegar
15 drops Lemon essential oil
- The first thing you will need to add to your spray bottle is 1 cup of water.
- Next, add one cup of distilled white vinegar.
- Then add 15 drops of lemon essential oils.
- Place the top securely onto your spray bottle and shake well. I recommend shaking well before each use. Because there are no chemical binders in most homemade spray, the ingredients can separate a bit between uses. A quick shake will fix this. Now, just spray your surfaces and clean as you normally would with a soft cloth or paper towels!
HOMEMADE GOO GONE
1/2 cup of Coconut Oil
1/2 cup of Baking Soda
6 drops of Lemon Essential Oils
- You will need 1/2 cup of Coconut Oil, 1/2 cup of Baking Soda and 6 drops of Lemon Essential Oils.
- Mix the coconut oil and baking soda together in a bowl. The coconut oil will be solid at first, but as you mix, it will soften and blend with the baking soda. Now add your lemon oil and mix well with a spoon.
- Smear the paste all over the label you want to remove and let sit for 15 minutes.
- To get the label to pull away from your container, run it under warm water and start to pull back the label. If some areas resist, simply scratch them a little with your fingernail to get them off…they should detach pretty easily. Once your label is off, use a damp cloth to remove any leftover sticker. Rinse and dry…
- And there you have it!
It’s Your Turn
Connect with us @culture.of.sustainability and share any pictures of your homemade cleaners, or recipes you swear by and we’ll share them!
| What is the Culture of Sustainability? The Culture of Sustainability is an evolvGREEN program that seeks to leverage the unique opportunity the evolv1 building provides and build a community that has sustainability embedded in its identity. Follow us on Instagram @culture.of.sustainability to learn more! |
Source: https://www.thespruce.com/reasons-to-start-green-cleaning-today-1706950